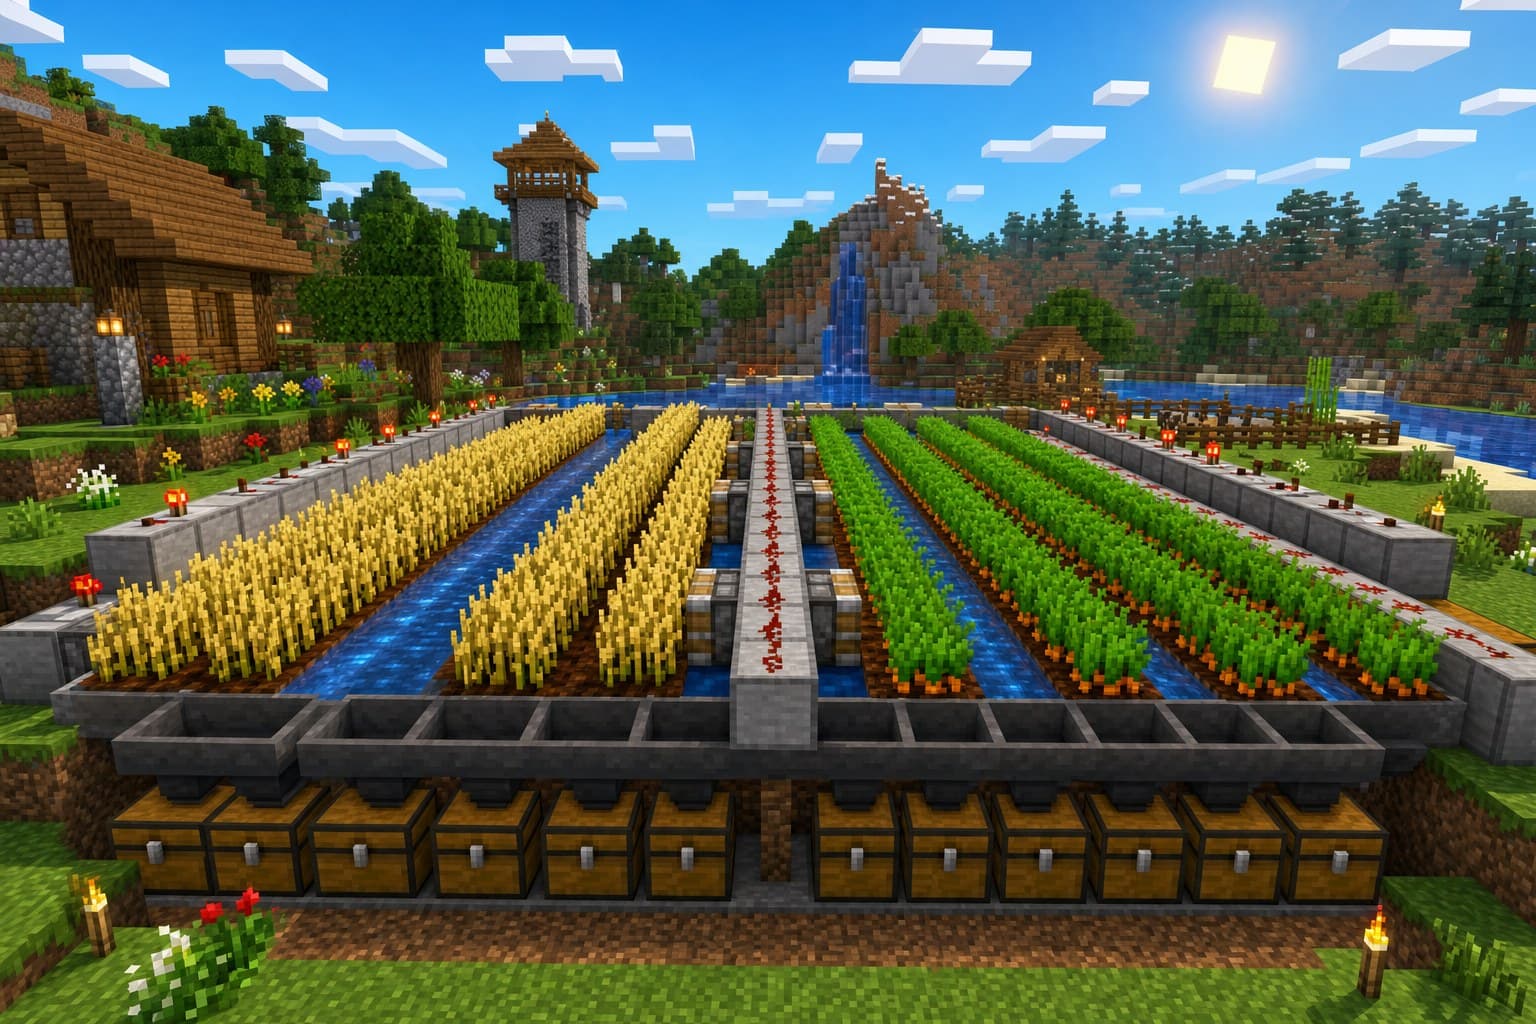
Tired of manually replanting every wheat field after a long harvest? An automatic farm takes that chore off your hands completely — you'll just walk in, and crops will practically deliver themselves. This guide covers a simple, beginner-friendly water-flow farm that works for wheat, carrots, and potatoes, so you can spend more time exploring and less time farming.
What You'll Need to Get Started
- A Hoe: To till your farmland
- Seeds: Wheat seeds, carrots, or potatoes (carrots and potatoes plant themselves as the item)
- Water Bucket: To hydrate the farmland and wash crops toward collection
- Hoppers: To collect harvested crops automatically
- A Chest: To store your collected crops
- Dirt or Farmland Blocks: For your growing area
This design doesn't require redstone at all for the basic version, which makes it a great first automation project if circuits still feel a little intimidating.
Understanding the Design
The core idea is simple: crops that are fully grown and knocked loose will float as items and get pushed by flowing water toward a collection point, where a hopper scoops them into a chest. You provide the "harvesting" by breaking the crops (or using a dispenser with a water bucket for a more advanced setup), and the water and hoppers handle the rest.
Step 1: Build the Farmland
- Dig a trench one block wide down the center of your planned farm area
- Till the soil on both sides of the trench with your hoe to create farmland
- Keep the farm plot within 4 blocks of the water trench on each side — crops need nearby water to grow
A good starter size is 9 blocks of farmland on each side of a single water channel (crops need to be within 4 blocks of water).
Step 2: Add the Water Channel
- Place a water source block at one end of your center trench
- Let it flow down the length of the trench
- If your farm is longer than the water can reach, add source blocks every 8 blocks to keep it flowing all the way through
Step 3: Plant Your Crops
- Right-click on the tilled farmland with seeds, carrots, or potatoes to plant them
- Space them out so the whole plot is filled
- Wait for them to grow — carrots and potatoes take a bit longer than wheat, so be patient!
Step 4: Set Up the Collection System
- At the low end of your water trench, dig down one block and place a hopper facing into a chest below it
- Cover the hopper with a block, leaving the water flowing directly over it
- When you break mature crops, the items will float in the water current and get swept into the hopper automatically
Step 5: Harvest Time
- Walk along your crop rows and break each fully grown plant
- Watch the drops get carried by the current straight into your hopper and chest
- Replant right away, or leave carrots and potatoes — they'll often replant a few for you since some potatoes and carrots don't fully harvest one-for-one
This manual-harvest version is a great starting point, and honestly, it already saves a ton of time compared to searching your fields block by block for stray drops.
Making It Fully Automatic (Dispenser Method)
Want to skip breaking the crops by hand entirely? This upgrade uses redstone, so it pairs nicely with what you learned in our redstone basics guide:
- Place dispensers filled with water buckets along one edge of your crop rows, angled to face the farmland
- Wire the dispensers to a redstone clock or a lever you can flip on demand
- Activating the dispensers releases a burst of water that instantly knocks all mature crops loose and washes them toward your hopper
- The dispensers reabsorb the water automatically once triggered again, resetting for the next harvest
This version turns your farm into a one-button harvester — flip a lever, and an entire field gets cleared and collected in seconds.
Adapting the Design for Other Crops
The same water-flow layout works for more than just wheat, carrots, and potatoes:
- Sugar Cane: Plant along the edge of any water source (it doesn't need tilled soil) and use an observer facing the top block to detect growth and trigger a piston that knocks it loose — a slightly more advanced but very popular fully-automatic build
- Melons and Pumpkins: Plant the stem on farmland next to your water channel; the fruit grows on an adjacent block and can be harvested with the same water-flow collection system without disturbing the stem
- Nether Wart: Works differently since it doesn't need water at all — just soul sand and time — but you can still use a hopper-minecart or hopper collection system underneath for automatic gathering
Scaling Up to a Bigger Farm
Once your first plot is running smoothly, expanding is mostly a matter of repetition:
- Build additional parallel rows, each with its own water channel spaced no more than 8 blocks apart
- Feed every row's hopper into a shared collection line using more hoppers pointed toward a central chest or hopper-minecart track
- Add extra light sources across the whole area so crops keep growing overnight
- Consider a composter next to your farm — extra seeds and produce convert into bonemeal, which you can use to instantly grow more crops by hand when you need a quick boost
A farm covering even a modest 9x9 area per row can supply more wheat and vegetables than most players know what to do with, which is great news if you're also running an animal breeding setup that needs a steady food supply.
Common Mistakes to Avoid
- Crops won't grow: Make sure every crop is within 4 blocks of a water source, and that the block below is farmland, not dirt
- Drops aren't reaching the hopper: Water needs a continuous current in one direction — check for any dry spots breaking the flow
- Hopper isn't collecting: Hoppers only pull items from directly above them, so double-check placement and facing
- Crops keep breaking too early: Water flow can occasionally uproot young crops if placed too close — leave one block of buffer next to the water source block itself
Tips for a Better Farm
- Light your farm well with torches or lanterns so crops keep growing at night and hostile mobs don't spawn on your fields
- Build multiple parallel rows with separate water channels to scale your farm up without slowing down growth
- Use a composter next to your farm to turn extra seeds and scraps into bonemeal for even faster regrowth
Conclusion: Farming Made Easy
You've just built a farm that does the heavy lifting for you — no more walking endless rows one block at a time. Whether you stick with the simple water-collection version or level up to the dispenser-powered auto-harvester, you've unlocked a genuinely useful piece of automation that'll save you hours over a long survival world. From here, try scaling your design up, or combine it with an item sorter to organize everything your farm produces automatically.